SAP123
Loading Material Masters with LSMW Direct Input method
Willem Hoek on Jan 11, 2013
INTRODUCTION
It is a lot easier and quicker to load material masters using the Standard Direct Input object in LSMW rather than with a recording of transaction mm01 or mm02. (To learn more about loading data using recording, see this post.
One input file can be used to create all the views of the material master. For all the material types. Even if different views and fields are used for the different materials. Steps to take:
- Create text file with data to be loaded
- Set up and run LSMW
All steps are discussed in this post. A sample data file and LSMW Project can also be found in attachment. (see end of this post).
Note that my project and input file will need slight modification to work fully on your SAP system. You will have different material types, number ranges, field selections, etc. To get going, use my LSMW Project and data file and make changes as required to get a simple dataset loaded.
The most difficult bit in loading materials is getting the input file correct. I suggest you create the file from a database (SQL) or programmatically. Excel does work but it sometimes convert numbers / strings (example 0100 becomes 100). More notes about this at the end of this post.
Let’s first go through LSMW steps - then look at the input file.
LSMW
You can either create the LSMW project manually or load my project (in attachment at end of post).
Import Project
Download project as attachment from end of this post to your PC.
Go to LSMW - transaction LSMW
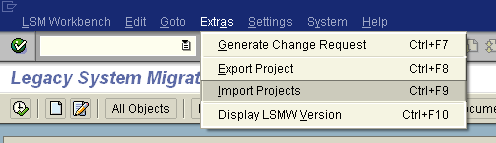
Menu: Extras > Import Projects
select file LSMW_Z2_MM01.txt
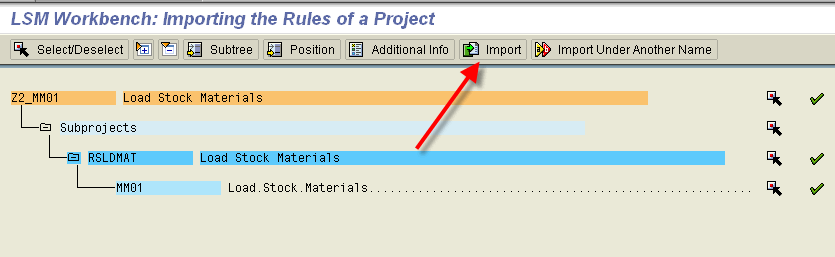
Press ‘Import’ (or ‘Import Under Another Name’).
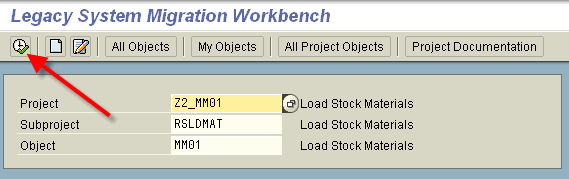
Select: Project / Subproject / Object and press ‘Execute’
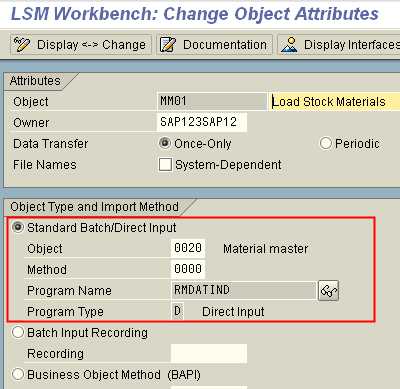
Step 1: Maintain Object Attributes
With first option selected -; press ‘Execute’
Press ‘Display <> Change’ to select Object
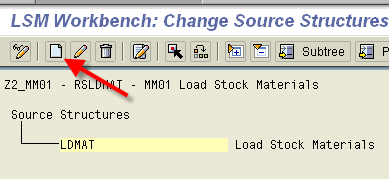
Step 2: Maintain Source Structures
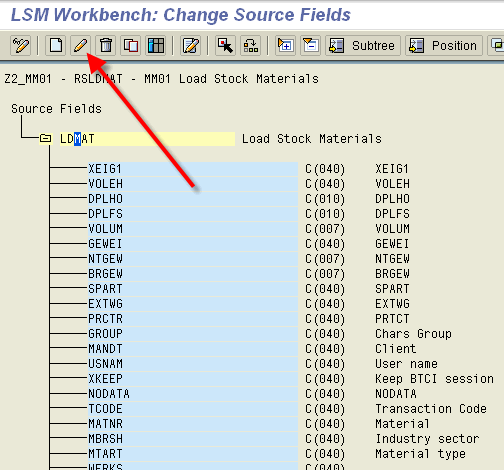
Step 3: Maintain Source Fields
Define here all the fields that will be in your input file (text file with data). As a rule, keep the field names the same as in SAP. This way mapping can be done automatically. The order of the fields is not important. For simplicity, make field size bigger than required, in this case mostly 40.
What fields can be included? See next step for that.
Step 4: Maintain Structure Relations
Here you map the one input file to structures that was selected in step one (direct input objects).
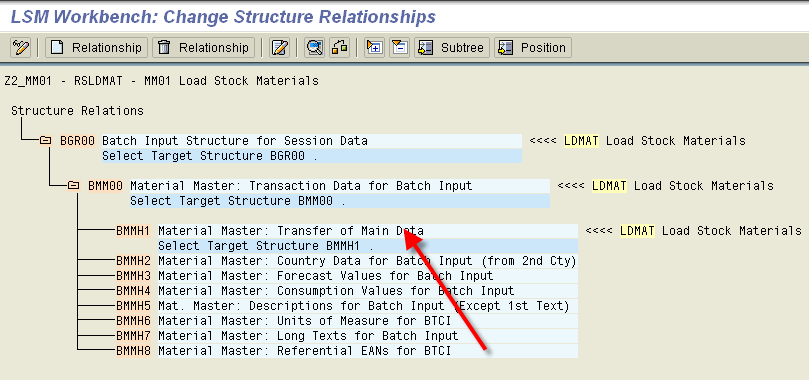
To get an idea what material master field can be loaded -; click on the structure. Example for BMMH1
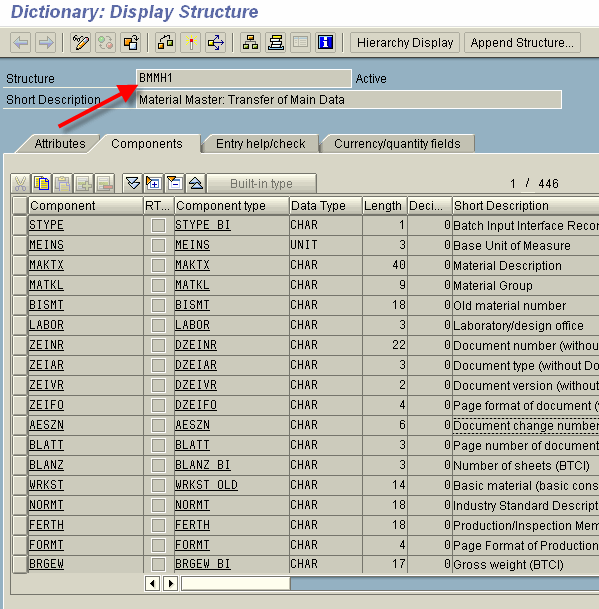
You will see BMM00 is to select the Views and BMMH1 contains bulk of the material fields.
The fields can also be viewed via ABAP Dictionary (se11 /se12) and display the database table BGR00, BMM00, BMMH1, BMMH2 (or other).
Step 5: Maintain Field Mapping and Conversion Rules
Map field in input file to fields in SAP Material master. If your fieldnames in file is same as in SAP, then you can map them automatically by selecting Menu: Extras > Auto-Field Mapping.
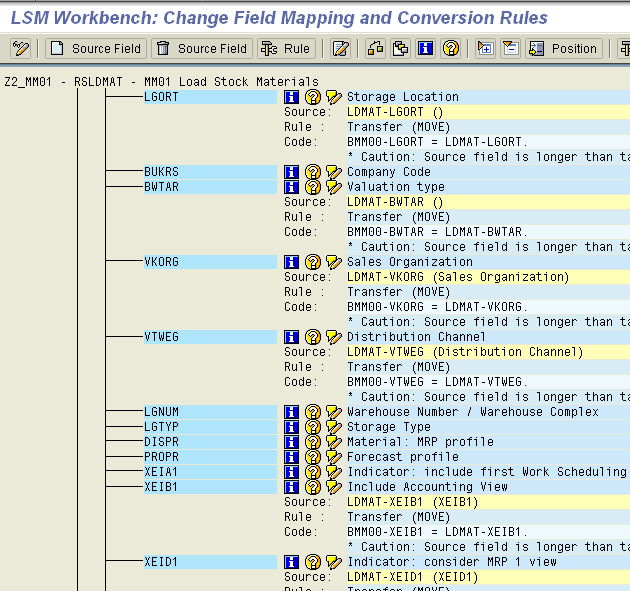
Not all fields need to be mapped, only those that you are loading (as defined in input file). Don’t worry to much about the warning that ‘Source field is longer than target file’ just make sure your input data is correct. Example material type must be 4 characters.
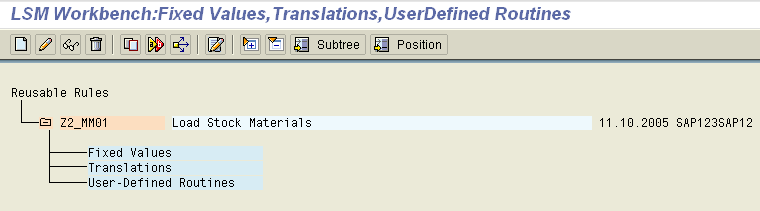
Step 6: Maintain Fixed Values, Translations, User-Defined Routines
Not used for this project
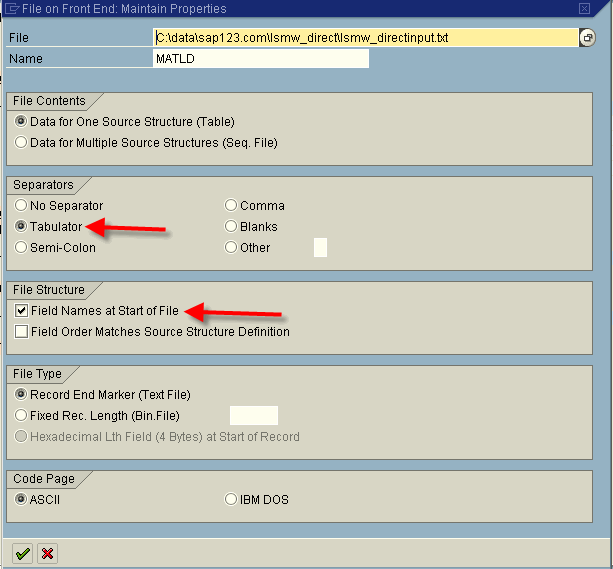
Step 7: Specify Files
Specify source file (on your PC) and what the files will be called on the SAP server.
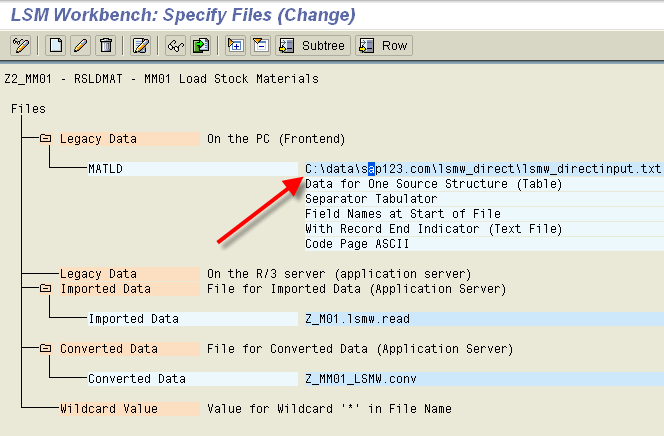
Also indicate how your input file will look. Example, TAB delimited and Field names in first row.
Step 8: Assign Files

Step 9: Read Data
At this point your input file must be ready. More about the input file later. You may want to use sample file attached to this post as a start. Note you don’t need to specify path / filename. This was done is step above.
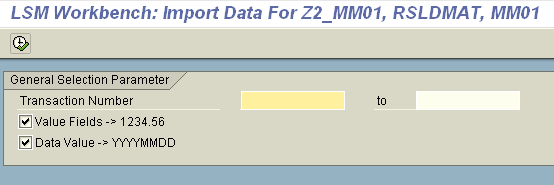
For big files -; many thousand of records this might take a while.
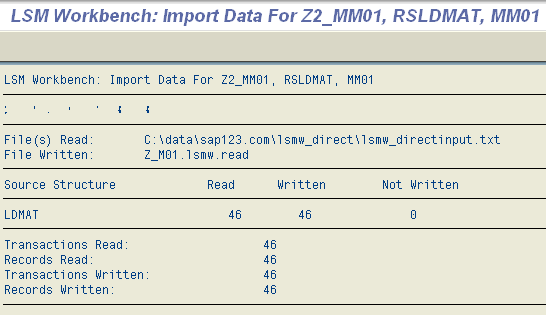
Step 10: Display Read Data
The input file is now on the SAP server and can be displayed.
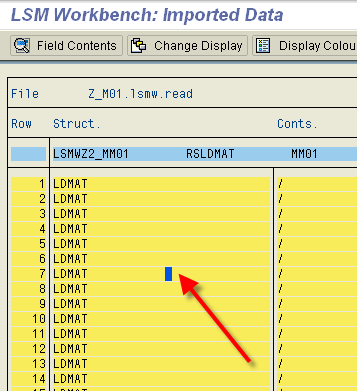
Click on line to see the details

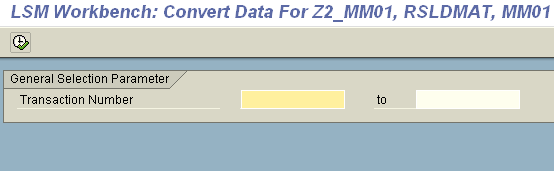
Step 11: Convert Data
We now need to convert the data to format so that SAP can process.
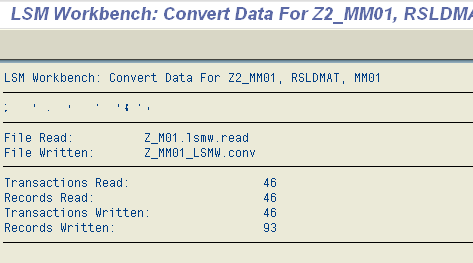
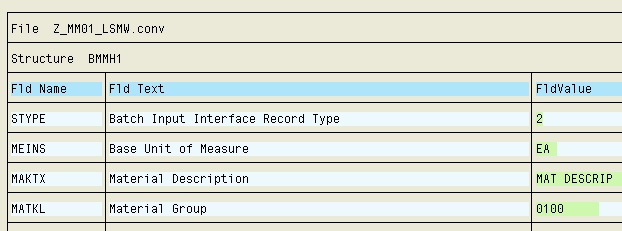
Step 12: Display Converted Data
You can display converted data to ensure that all is ok so far before creating the materials.
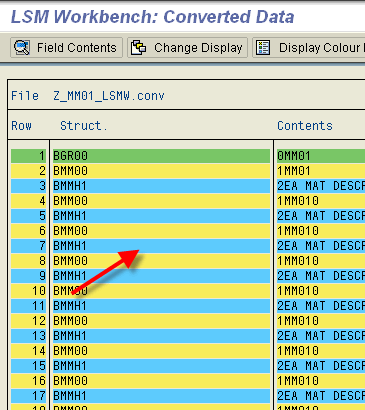
And select the structure to see details
Step 13: Start Direct Input Program
If all is OK -; let’s run them in.
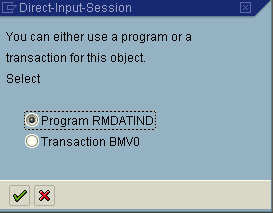
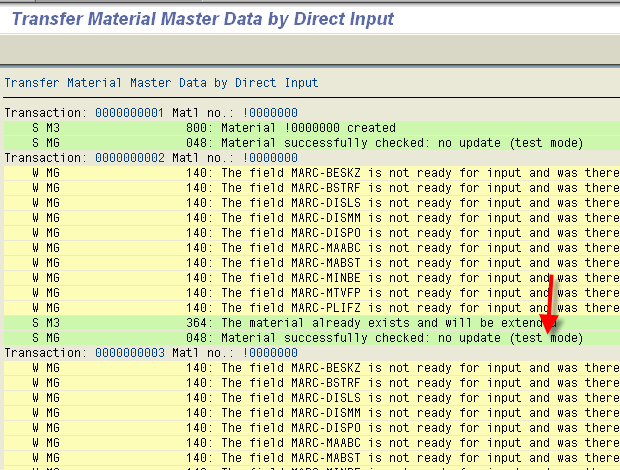
First run it in test mode (not creating material) by selecting the ‘Check data, do not update’ option
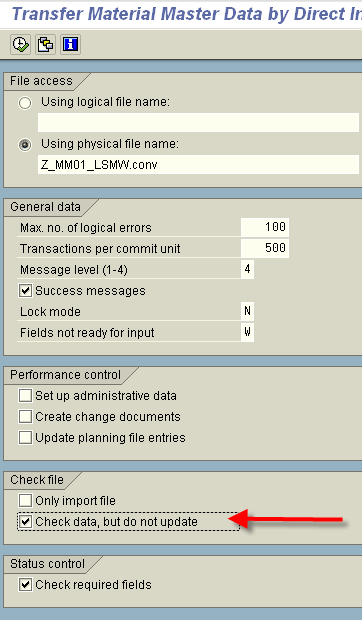
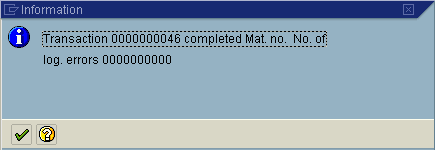
You might get a view messages -; just press OK. In my case I got NO errors.
I now run it without the test option. same as above but ‘untick’ the ‘Check data, do not update’ option
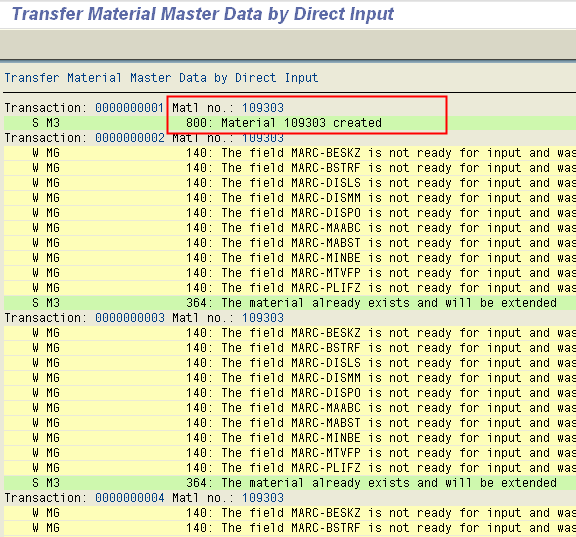
Materials were successfully created.
At this point you may still have errors. Either your input data is incorrect, you may have fields as mandatory that was not in your input fields, different material types, etc. etc.
INPUT FILE
In step 7 above we have indicated that we are using TAB delimited files.
TIP: if you will be working with LSMW files a lot, get a decent text editor. Some suggestions are: UltraEdit or Crimson Editor (if you want a good free one).
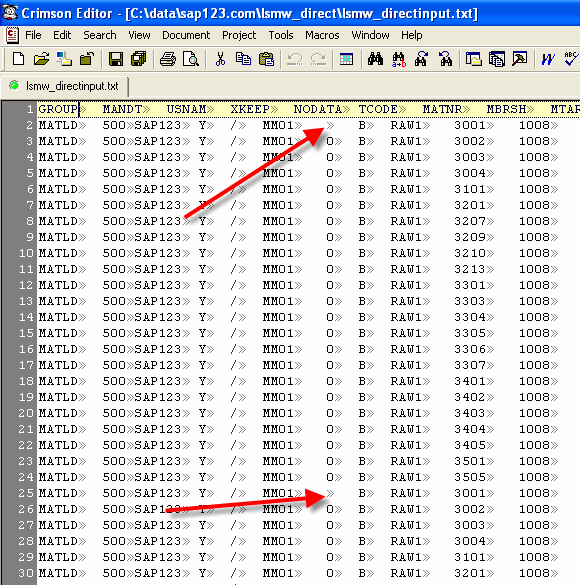
This is how my input file looks (via Crimson Editor). The funny ‘»’ fields are TAB’s. My editor is set up to show TAB characters.
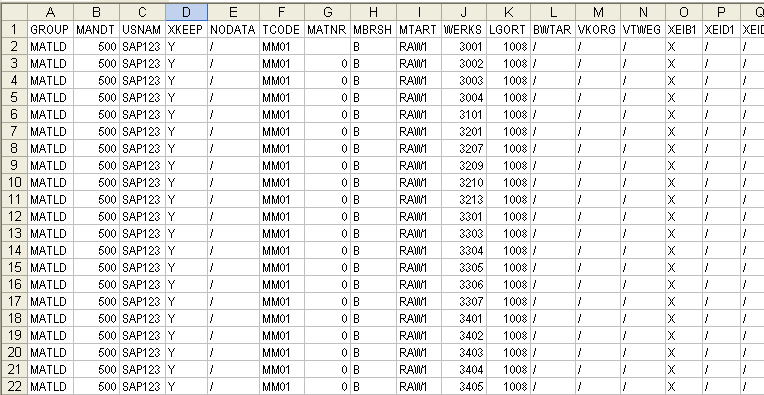
Or in Excel (importing the tab delimited file)
Note that the material number field (MATNR) is blank for first line and 0 (zero) for subsequent lines. This is the way to specify that internal numbering will be used. And 0 (zero) indicates that material being created will be extended. Fields to be ignored are marked with “/”. For more about format of file, see notes in SAP Help file.
In my file, every line is unique material / plant / sloc. The input file can be prepared using database, spreadsheet or other program. In my case I generated the tab delimited file directly from database program.
LAST NOTE ON PREPARING THE DATA (OPTIONAL)
I find the easiest way is to prepare the material master data is using a SQL database. That way a SQL script can be created that implement all the conversion rules.
This sample file used in this post was created directly from the database program. Below is the SQL statement (used in MySQL) that created the final data file. The header (field names) was added in another step.
SELECT  'MATLD','500','SAP123','Y','/','MM01', '0','B',mat_type, plant, sloc,
'/','/','/','X','/','/','X','/','X','X','/','/','/',base_uom,'MAT DESCRIP','0100',
'/','/','/','/',1,'/',1,'/','F','ND','001',1,1,'HB',1,100,'A','02','BIN','/',
price_control, price, val_class,'/',14,'/','/','/','/','/','/','/',
old_matnr,'01','00010',profit_centre
INTO OUTFILE 'c:/data/sap123.com/lsmw_direct/lsmw_directinput.txt'
FIELDS TERMINATED BY '  '
LINES TERMINATED BY ''
FROM main_table
GROUP BY mat_number, plant, sloc
ORDER BY mat_type, old_matnr, plant, sloc;
If above code is meaningless to you. Don’t stress, you don’t need to use any of this in LSMW. But I do suggest you buddy up with someone who knows SQL ![]() .
.
GETTING HELP FROM SAP
Very detail help is available in SAP Help Files. For SAP Help files, goto
This post was prepared using SAP R/3 Enterprise (and LSMW version 4.0.0)
Attachment
With this sample and reading the SAP Help files, I hope you are in a position to load your own materials.